Lake Erie Toolworks Workbench Idea – Southern Yellow Pine Roubo

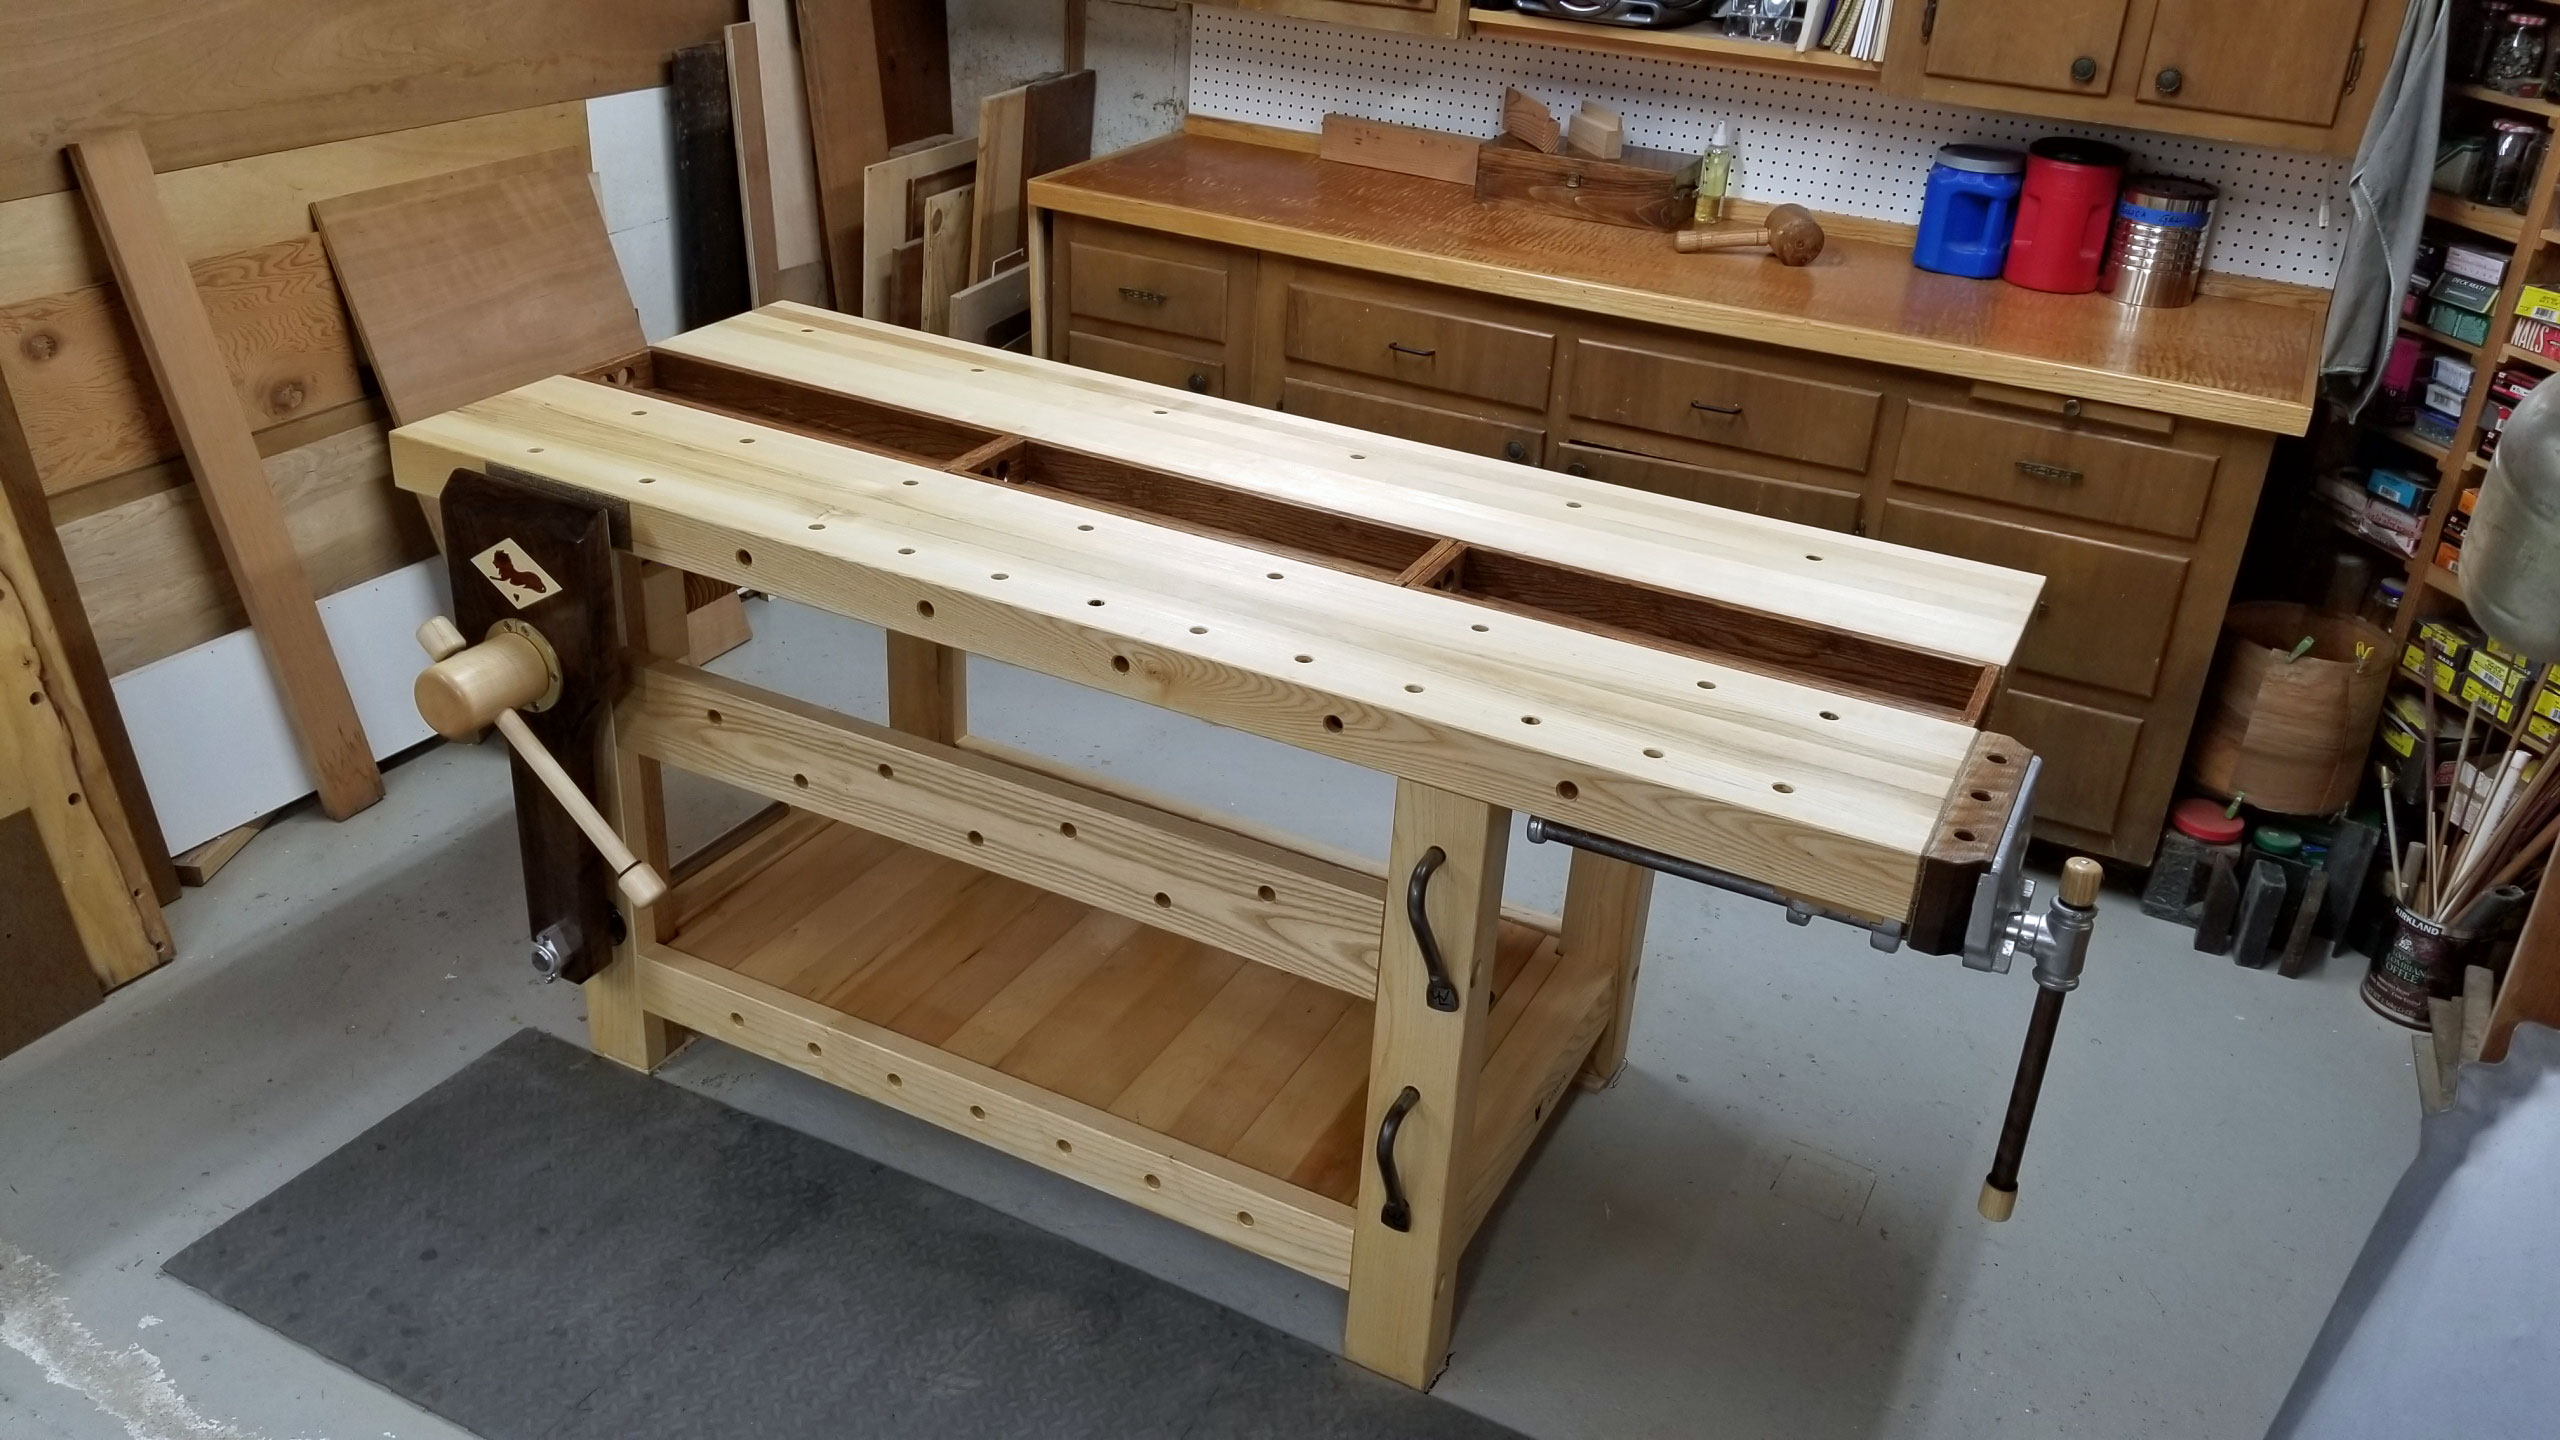
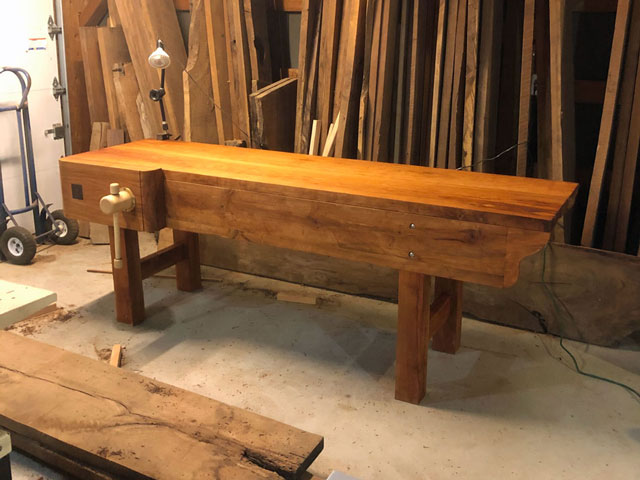
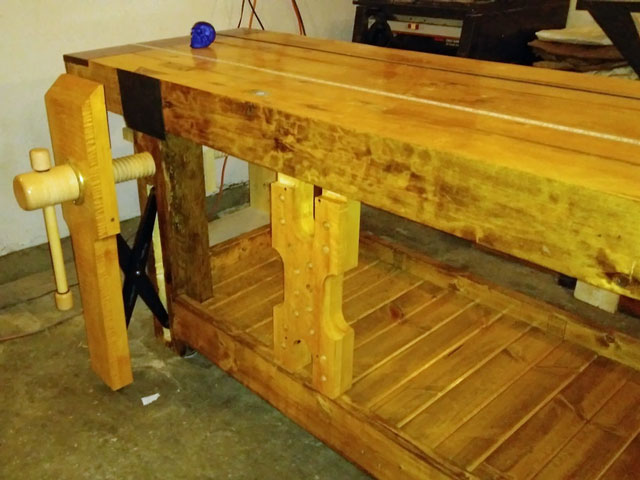
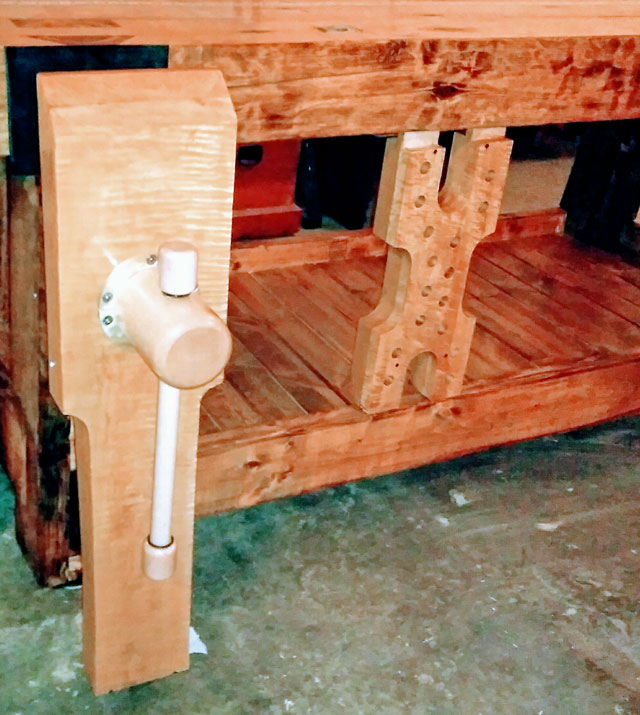
Thanks to Carl Johnson from Minneapolis, Minnesota for sending in this Anarchist’s Roubo Workbench featuring a wooden leg vise. Built mainly out of southern yellow pine, with a hard maple vise chop, Carl did quite the amazing job on this bench.

Lake Erie Toolworks, Roubo Workbench, Leg Vise, Wood Vise, Wooden Leg Vise

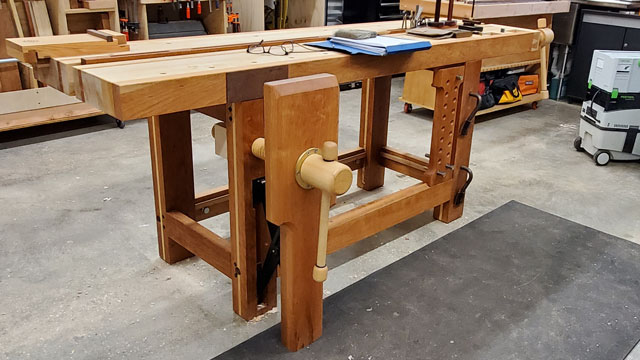
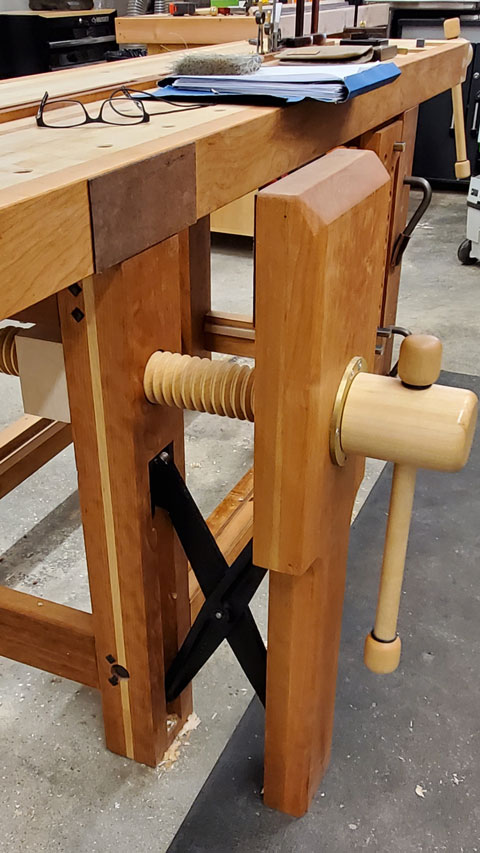
Here, at long last, is my new workbench. I built it according to the plans in the wonderful book, “The Anarchist’s Workbench” by Christopher Schwarz. I built it according to the plans almost verbatim. The only thing I altered was the overall length and opted for a wooden vise screw and parallel guide for the leg vise.

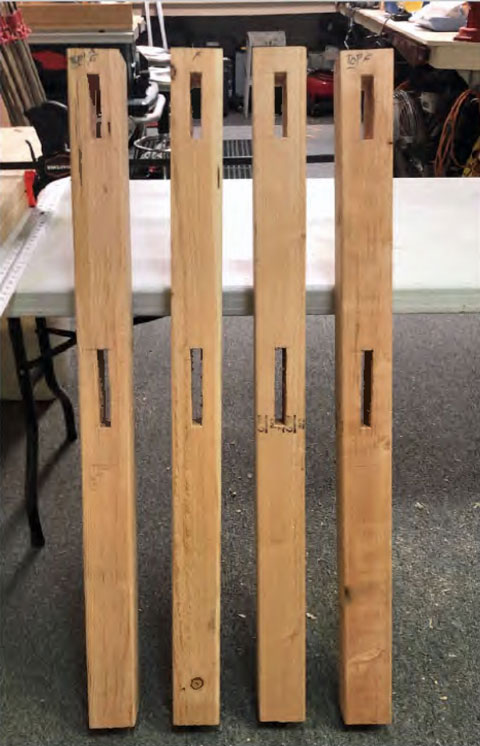
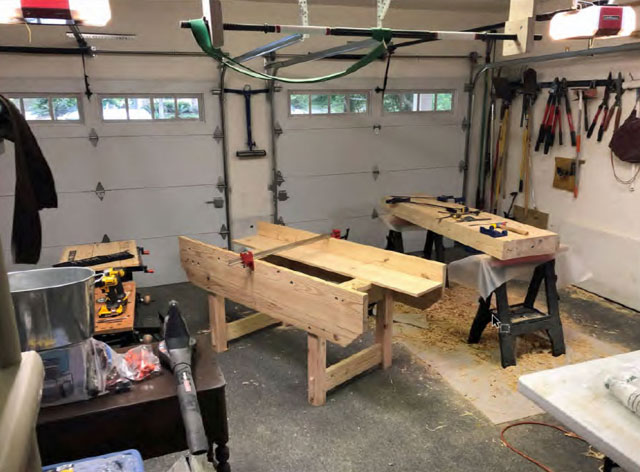
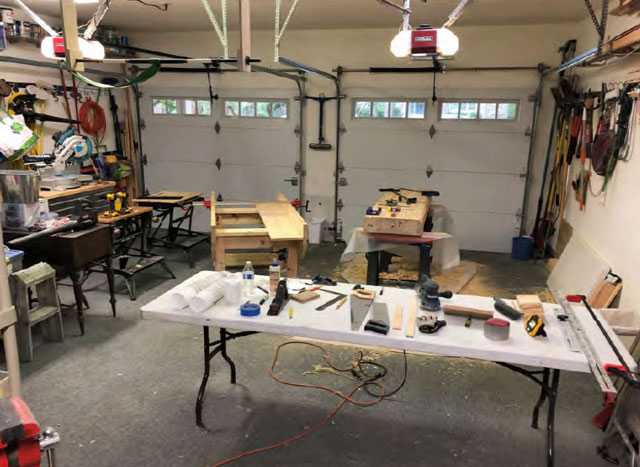
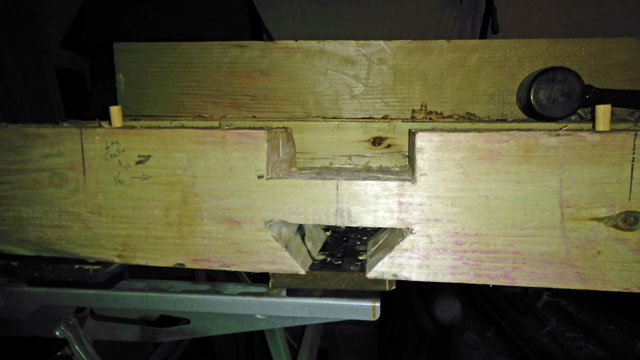
This bench has been my mistress for the last two months. I have only been woodworking for about a year and a half, and although I’ve built many different kinds of projects, this bench pushed me to a new level. Virtually every technique was new to me. This bench was my first stab at mortise and tenon joints, my first time ever using hand tools, and was also a great excuse to buy some new toys and tools!

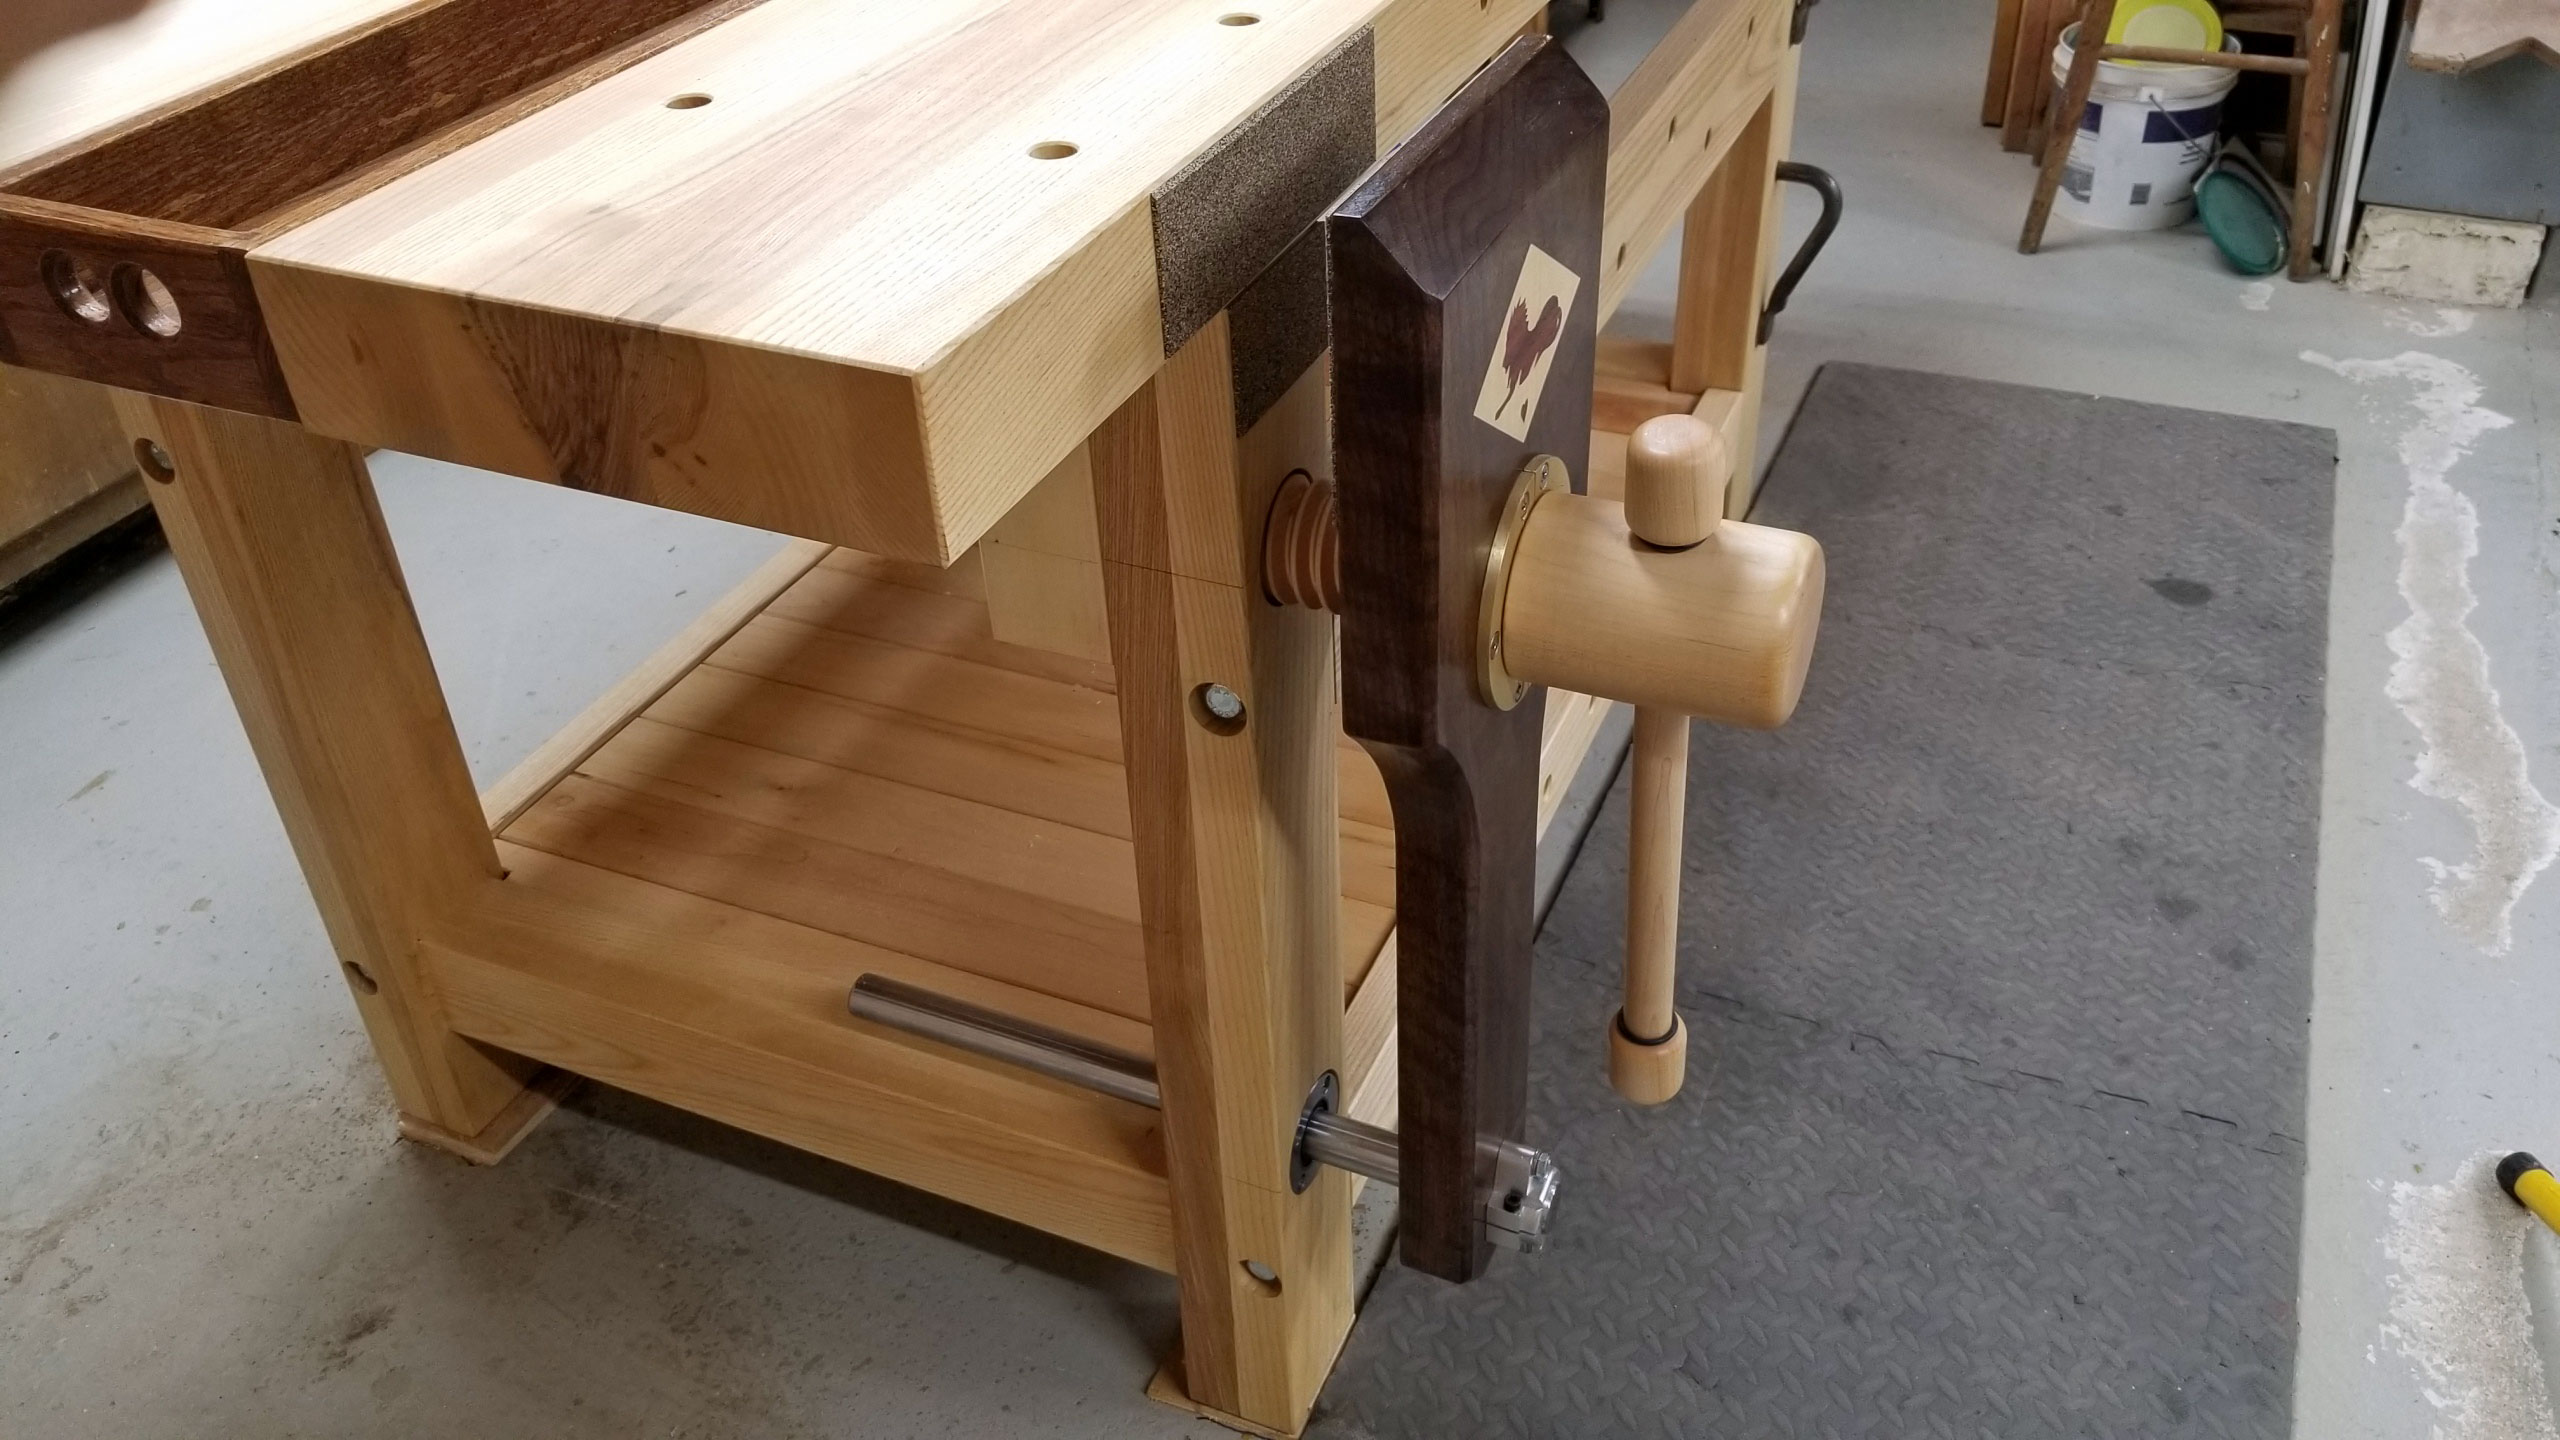
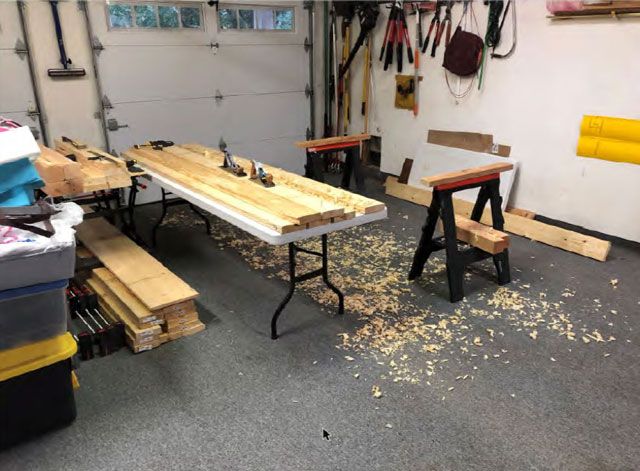
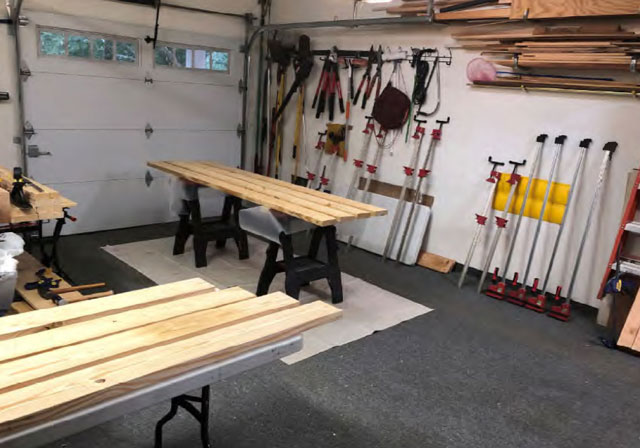
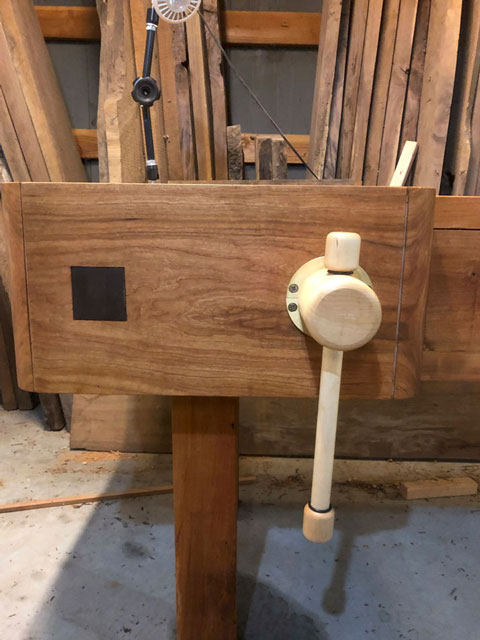
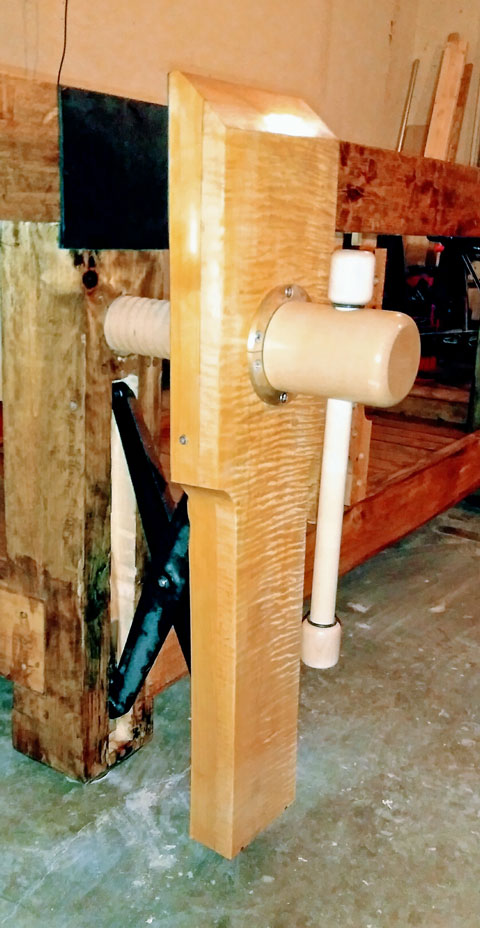
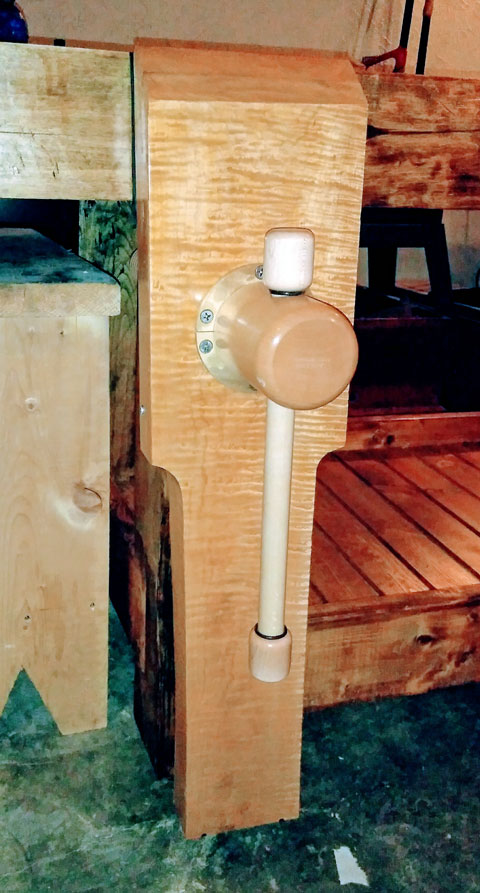
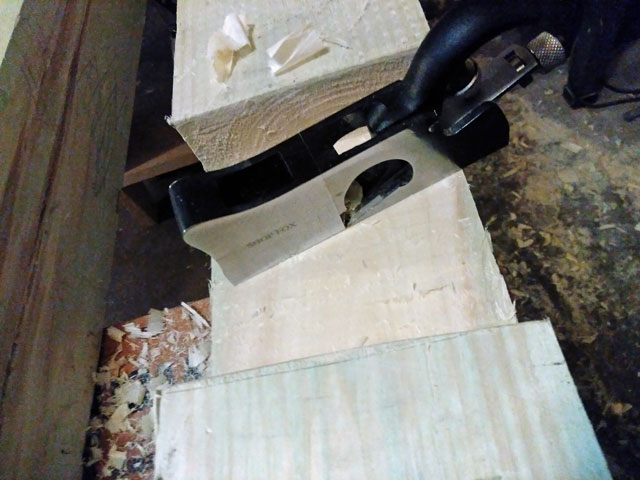
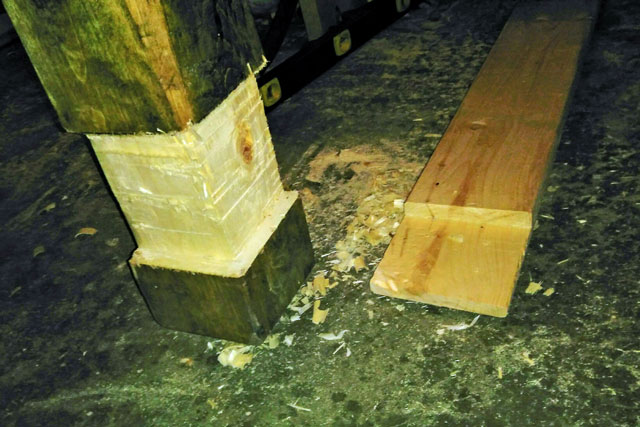
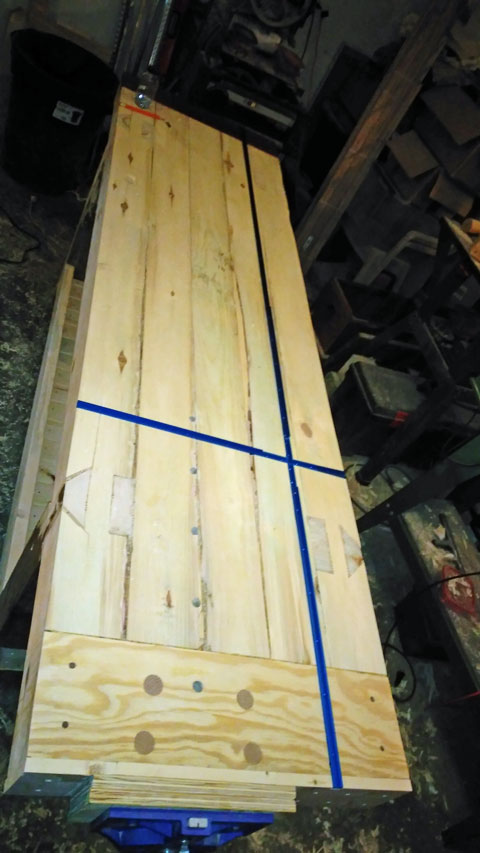
It is built entirely from southern yellow pine, except for the leg vise which is hard maple with curly maple on the face. I started out with eight 2x12x12 boards and cut them all to rough length before planing them down to 1 ¼” and ripping them to width (this gave me a great excuse to buy a rip blade for the table saw).

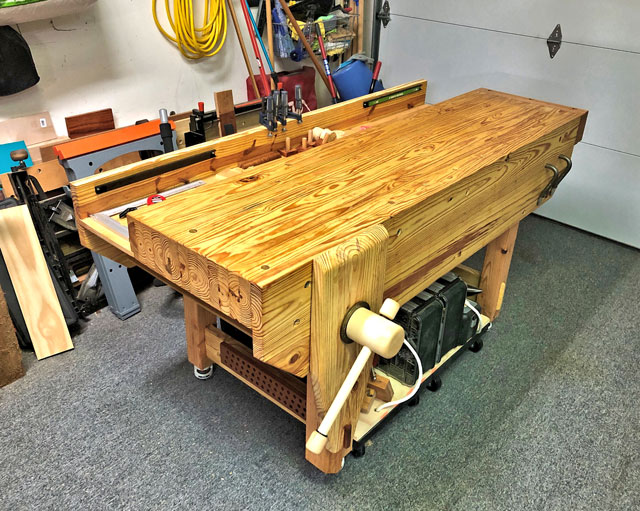
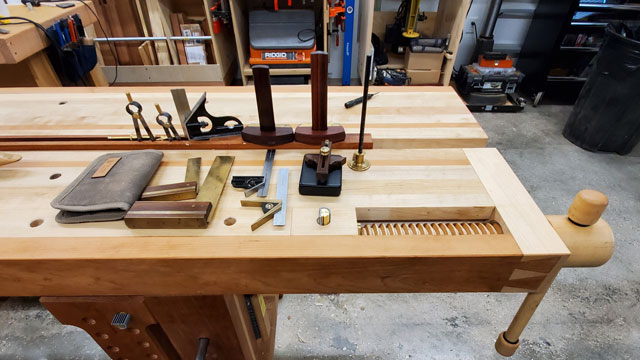
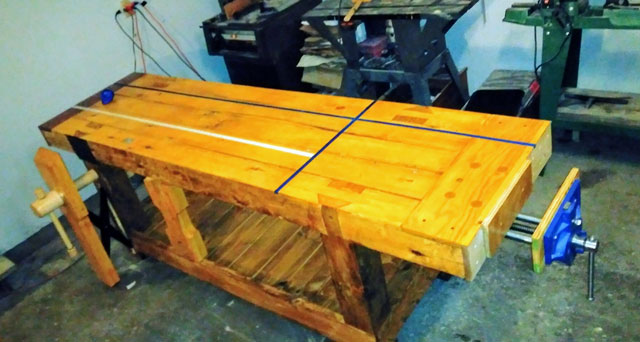
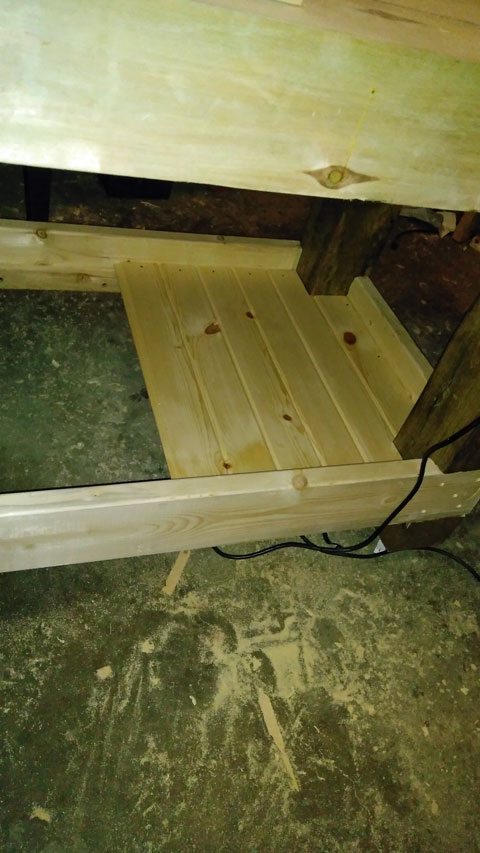
The top is 5” thick, around 5 ½’ in length and 22” for width. I opted for a 35” height, so we’ll see how I like that height when hand planing. As per the book, I bought some architect’s lamps for lighting. I made bases for them out of canary wood and pau rosa, which I turned on a lathe to make into thick hockey pucks. I cut a hole in the top of the base for the lamp to slide into, then attached a 1” dowel through the underside so the bases can sit in the holdfast holes.

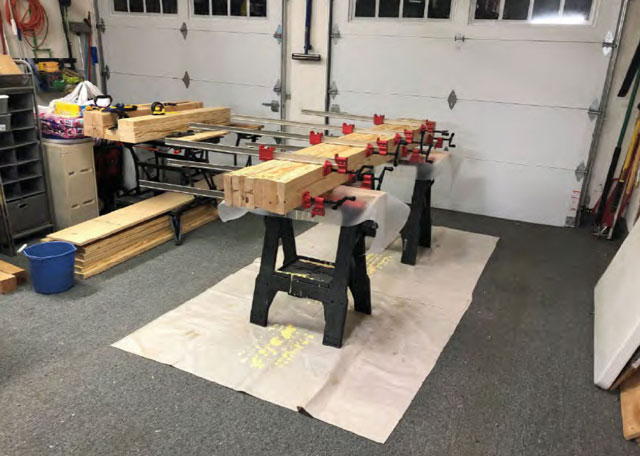
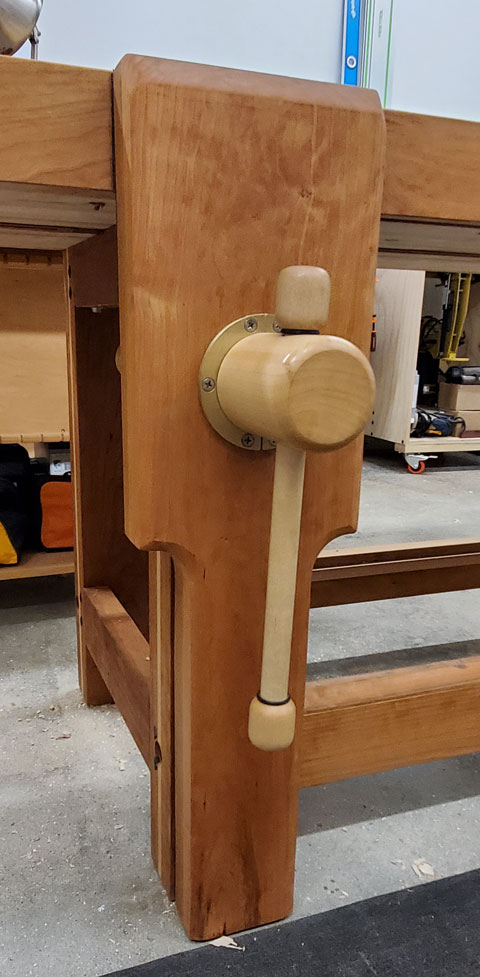
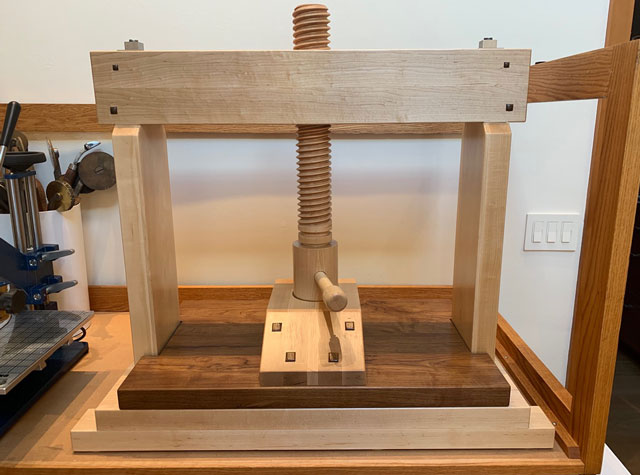
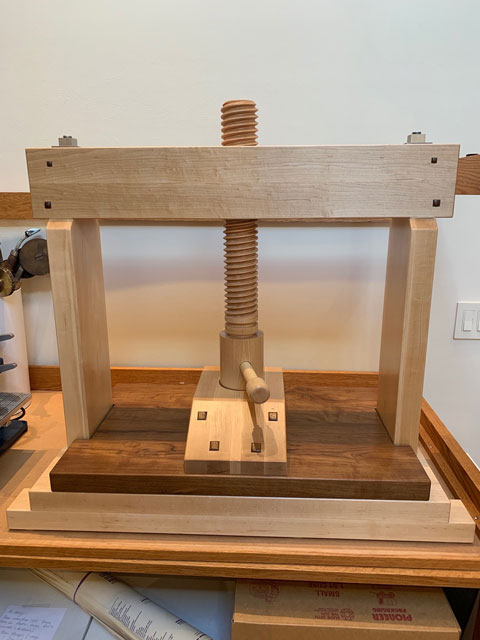
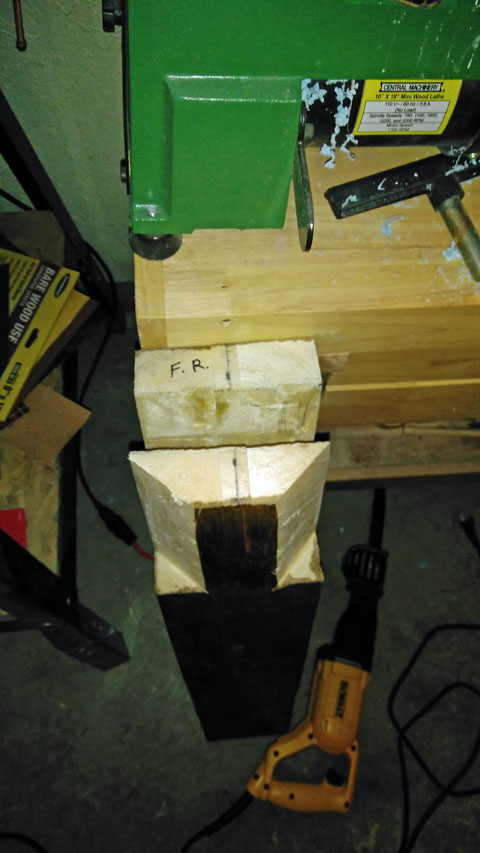
As I mentioned before, I opted for wooden vise hardware over steel because I just loved the look. I briefly considered making my own wooden screw and nut out of hard maple, but decided it wasn’t worth the time hassle at this point in my woodworking journey. Enter Lake Erie Toolworks. I bought the premium kit, and was not disappointed. All the components are made from single pieces of hard maple and they’re absolutely beautiful. And boy does this thing clamp hard!

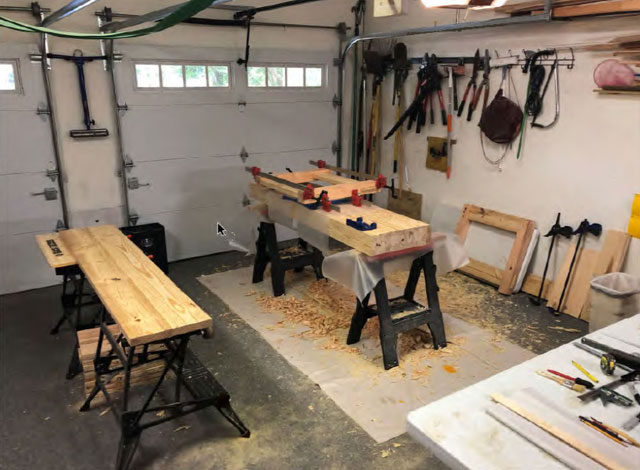
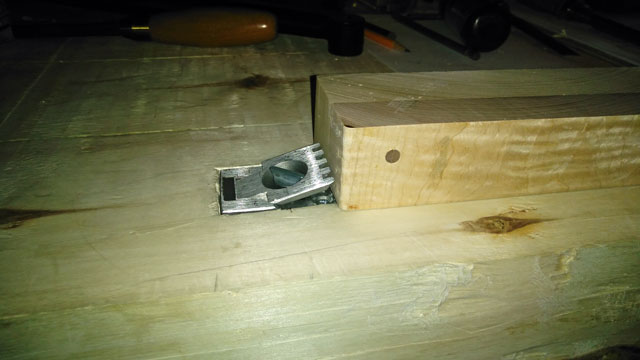
The rest of the bench I finished with a 1:1:1 mix of boiled linseed oil, polyurethane and paint thinner. This bench has been a labor of love, and by far the lengthiest project I’ve undertaken. It’s hard to believe it’s done, because for so long there was always something to do next. I’m still waiting on a planing stop, though (the popularity of the book probably resulted in a deluge of orders to the blacksmith that Chris mentions in the book).

The whole reason for building this bench was to have something I can use to build staked furniture, so those are going to be my next projects. Though, I think I may take a breather for a while…
Carl Johnson – Minneapolis, Minnesota

Lake Erie Toolworks Workbench Idea – Multi Vise Roubo

Many thanks go out to Bill Cary from Suffolk, Virginia for sending in this fantastic workbench idea.  Bill sent in a complete build portfolio from start to finish of his amazing Roubo Workbench.  We thoroughly enjoyed following his build process and I trust that you will as well.  What a great job!

Lake Erie Toolworks Workbench Idea, Roubo Workbench, Leg Vise, Wooden Vise

“Attached are pictures of my Roubo bench that I used your Lake Erie Toolworks Wood Vise Screw Premium Kit on for my leg vise.  I also used a vise that is similar to a Sheldon vise, but much larger, for the tail vise and an Emmert patternmakers vise for the end adjacent to the leg vise.

I began the bench around the end of August, 2021 and completed it on October 20,2021. 

I began with a 6×6 piece of rough poplar which was acquired at a local lumber yard.  I finished it to 5”x5”x32.25”.  The dovetails and tenons were cut with a Japanese pull saw. 

The top was made from hard maple that I have had for about 25 years.  It is 5” thick x 24”x 72” not including the vises.  It was glued in sections.  I used biscuits to align the boards as I glued them.  I ran the first eight pieces that I glued through my planer.  I clamped the last three pieces to each side of the original eight and laid out the dovetails and tenons.  Unclamped the boards, made the cuts and glued each three-piece section together, let them dry, ran them through the planer and glued them to the eight-piece section. 

I cut 5” mortises in the legs and glued 1.5”x 5” stretchers to connect the legs.  The mortises were inset 1” on the legs to allow me to glue a 1”x 5” wide board to the stretchers to bring them even with the outside of the legs. 

I made the cuts in the bottom of the top to accept the Emmert and the slot for the deadman to slide in.  I made several test fits of the top and base before gluing them up with West System epoxy. 

I attached the Emmert and the tail vise to the top before attaching the top and base. 

Next, I made and installed the deadman. 

The Leg vise came next.  I followed the kit instructions for installation of the screw.  I am very pleased with the quality of the screw kit and how it works. 

I next made the bottom shelf from poplar.  It was ship lapped and v grooved. 

I made and installed the vice jaws for the tail vise after which I bored the 3/4” dog holes. 

The bench was finished with 3 coats of an equal mixture of boiled linseed oil, mineral spirits and varnish.”Bill Cary – Suffolk, Virginia

Lake Erie Toolworks Workbench Idea – Split Top Roubo

Special thanks to Geoff Bertin from Big Lake, Minnesota who sent in this latest content for our Lake Erie ToolworksWorkbench Idea” forum.  Geoff built this tremendous rustic looking split top Roubo workbench with a very unique wooden screw powered leg vise. Pretty slick!

Lake Erie Toolworks, Split Top Roubo Workbench, Leg Vise, Wood Vise, Wood Leg Vise

“I finished my bench a few weeks back and have some pics to share. The bench is 7’ long and was build using plans from the Wood Whisperer, with a few tweaks. The chop is walnut and curly maple as are some of the other accents. The bench is soft maple. Geoff Bertin – Big Lake, Minnesota”

21st Century Workbench Idea

Thanks to Bill Leonhardt from East Patchogue, New York for sending in this detail regarding his version of the 21st Century Workbench that features a Lake Erie Toolworks wooden vise screw instead of the original metal twin screw design. This is truly one amazing workbench.

Lake Erie Toolworks, Workbench, Leg Vise, Wooden Vise, Wood Vise, 21st Century Workbench

I was attracted, at first sight, to the 21st Century Workbench built by Robert Lang and featured in a Popular Woodworking magazine in 2008.  I finally got an opportunity to build this bench in the beginning of 2020 and, fortunately, procured all the materials just before the Covid pandemic hit.  It took me 4 to 5 months to complete and the final dimensions are 75” long (not counting end vise) x 30” wide x 34.5” high.  The top is 3” thick and the final weight is about 312 lbs.  The bench material is ash, and a nice feature is the fact that the top is in two halves and each half is narrow enough to fit through a normal 13-inch planer.  

One of the reasons I am attracted to this bench is the fact that the base uses both upper and lower stretchers, which means it does not use the top for support or to stiffen it.  That is important to me, because my use of the top is an evolving philosophy.  With an “independent” base, I can reconfigure the top in the future if I choose to and still maintain the stiffness and rigidity the base offers.

I deviated somewhat form the original bench design to better accommodate my space limitations and to incorporate a leg vise in place of the original twin screw. I also changed the method of connecting the long stretchers to the legs so that the bench could be broken down and transported more easily.  I opted for a leg vise with wood screw in place of the double screw vise and I used a quick release vise I had on hand for the end vise.

In building the leg vise, I used a precision shaft and linear bearing in place of the traditional multi-hole plate at the bottom of a typical leg vise which eliminates the need to shift the spacing pin for different material thicknesses.  I chose a Lake Erie wood screw because it has a much coarser thread (than a metal screw) which means less turns for the vise travel.  The combination of the precision shaft and wood screw makes for an exceptionally smooth operating vise.

In applying finish to the bench, I wanted to protect the wood, but, at the same time, I wanted to not have a slippery surface for working.  In the end, I chose to use two wiped-on coats of the following mixture:  1/3 mineral spirits + 1/3 polyurethane + 1/3 boiled linseed oil.  I am pleased with the way this turned out as I got the desired surface.

Note that the tool trays can be reversed to make one continuous top or removed to make clamping on one of the top halves easier.  Additionally, I can saw wood that is held in the end vise “right-handed”. Never had this before since a typical face vise is at the left end of the bench. At this point, I am very happy with the current configuration and I anticipate no changes.  I do however, like the fact that I can easily reconfigure the top in the future if I change my mind.

Lake Erie Toolworks Workbench Idea – March 2021

Our latest Workbench Idea was sent in by Matt Miller from Clear Lake, Iowa who has one of the greatest workbench and workshop setups that we have ever seen.  Matt’s father and grandfather taught him the woodworking craft well and assisted by his wife and son, Matt crafted the workbench and shop of a lifetime.  His massive walnut 2X wooden twin screw vise is also the cherry on top to finish up this functional woodworking paradise.

Lake Erie Toolworks, Twin Screw Vise, Wood Vise, Wooden Vise, Workbench
Lake Erie Toolworks, Wood Vise

I started woodworking when I was just a kiddo. My Grandfather and Father owned a hardware store where I learned about good tools, cut glass, electrical and plumbing. What an education! I worked in the hardware store until I was 28 and went to work as a sales manager for a baking company for the next 34 years, retiring 4 years ago.

My Grandfather made all his own furniture in his house and I was always amazed how well he made his projects with very minimal hand and power tools. I inherited a lot of my woodworking tools and knowledge from my Grandfather and my Father. 

The Cadillac walnut twin screw vise is 8″ x 36″.  It is held together with the two biggest screws that Lake Erie Toolworks makes (2X wood vise premium kits). You guys make our projects look and work great!

My Workbench I built with my wife and son in 2005. It took us 3 years to build. It is built from quarter sawn white oak with some red oak and walnut as accents. Over 8 feet long with a double row of bench dogs along with the Emmert patternmakers vise are a joy to use. The two Record bench screws and the Record vise make woodworking simple and easy. 

I have totally restored all my Delta woodworking power tools and use them daily.

My woodworking shop is truly heaven on earth. I am always busy and my children and grandchildren will pull up a stool to the workbench where we tell stories and share a beverage. It is the place to sit and many a story has been told and embellished at this bench.

Sincerely, Matt Miller – Clear Lake, Iowa

Lake Erie Toolworks – Modified Nicholson English Workbench Idea

Our latest Workbench Idea comes from Tom M. from The Woodlands, Texas who has built a modified Nicholson English Workbench with a leg vise.  This juggernaut weighs in at around 300 pounds and is solid as a rock.  Tom also shows us the various major steps of construction that he used to build this monster bench from planing & joinery of the various wood components through glue-up and final assembly.  Enjoy!

Lake Erie Toolworks, English Workbench, Nicholson Workbench, Leg Vise, Wood Vise,

Lake Erie Toolworks, English Workbench, Nicholson Workbench, Leg Vise, Wood Vise,

Lake Erie Toolworks, English Workbench, Nicholson Workbench, Leg Vise, Wood Vise,

Lake Erie Toolworks, English Workbench, Nicholson Workbench, Leg Vise, Wood Vise,

Lake Erie Toolworks, English Workbench, Nicholson Workbench, Leg Vise, Wood Vise,

Lake Erie Toolworks, English Workbench, Nicholson Workbench, Leg Vise, Wood Vise,

Lake Erie Toolworks, English Workbench, Nicholson Workbench, Leg Vise, Wood Vise,

Lake Erie Toolworks, English Workbench, Nicholson Workbench, Leg Vise, Wood Vise,

Lake Erie Toolworks, English Workbench, Nicholson Workbench, Leg Vise, Wood Vise,

Lake Erie Toolworks, English Workbench, Nicholson Workbench, Leg Vise, Wood Vise,

This design was inspired by Paul Sellers on YouTube.  My version is a bit bigger.  I built is using hand tools only – just to see if I could.

The wood materials are Southern Yellow pine construction lumber purchased from Lowes.

The bench is sealed with boiled linseed oil, weighs about 300 pounds and is as solid as a rock.  I think it will last.

Regards,

Tom M. – The Woodlands, Texas

Lake Erie Toolworks – Split Top Roubo Workbench Idea

Our latest Workbench Idea comes from Ed D. from the Big Easy, New Orleans, Louisiana, who has built a fantastic Split Top Roubo Bench featuring a leg and wagon vise. Enjoy.

Lake Erie Toolworks, Workbench, Leg Vise, Split Top Roubo, Wood Vise, Workbench Idea

Hey Jeff!
I started this bench over a year ago but haven’t had time to finish it until now, since the pandemic closed me down for a few months. It’s made from 8/4 cherry and maple. I indulged myself and fancied it up a tiny bit with the laminated legs and ebony plugs.

Both vises work great. The wagon vise is an amazing help for planing as I’ve tried to make the transition to hand tools for everything except for initial milling.

Next on the agenda is a cherry tool chest that will fit into the base. Going to wooden screws is really a game-changer in my opinion when efficiency is a goal. Thanks again!

Ed D.
New Orleans, LA

Here’s Our January 2020 – Lake Erie Toolworks Workbench Idea!

Our latest Workbench Idea comes from Quentin W. who has built a tremendous English Style “Nicholson” Workbench featuring a face vise. The entire bench is also made out of cherry and she’s a beauty!.  Enjoy.

Lake Erie Toolworks, Nicholson Workbench, Wood Vise, Face Vise

Lake Erie Toolworks, Nicholson Workbench, Wood Vise, Face Vise

Primary construction of my modified Nicholson “English” bench is complete.  I still need to add holes in top and skirt.  I am waiting for arrival of holdfasts from blacksmith before drilling to assure proper fit.

The bench is constructed entirely from 8/4 cherry, glued up into 16/4 stock for legs and vise.  The top is flush with skirt in front, overhanging in the rear so that I have option of clamping a work light for detail work.

The vise jaw is a massive 4x12x24 inches, with a 3×3 walnut glide parallel to the screw to avoid racking.  Even with this weight, the Lake Erie vise is smooth acting.

The cherry had a number of imperfections that made it is less than ideal for a serious furniture project, but with a butterfly inlay securing a split on the rear skirt and a couple of dutchmen laid into the top, it is flat, solid, and good to go.

I am not sure of weight, but it definitely does not move no matter how hard I push.  For an 18th-century inspired bench designed for hand work, there is something very special about a wooden screw.

The heft and precision threads of the Lake Erie screw were an ideal match to this period style bench.

Quentin W. – Greenwich, NJ

Workbench Idea Is Actually a Book Press

Although our Lake Erie Toolworks wooden vise screw kits are typically used for workbench vises, on occasion we have customers that use them for non-workbench type applications such as book presses, printing presses and wine presses.

This said, for our latest Workbench Idea, we have a unique Book Press for your review that was designed by Larry Seeman from Carmel, California and built by Tony Andrews from Santa Cruz, California. Here you go.

Lake Erie Toolworks, Wood Vise Screw, Book Press

Lake Erie Toolworks, Wood Vise Screw, Book Press

Hi Nick, I thought you might like to see how I used your 2X Vice Screw in my new Standing Book Press. Came out nice, see 2 pics. The press is mostly hard maple, same as your Vice Screw and the platen that is raised and lowered to press the books is teak.  Vice Screw is attached to block that lifts the Teak platen via a 1” stainless steel threaded rod that is epoxied into the end of the Vice Screw and attaches to the lifting block that has a 1” flange bearing mounted on the bottom of the lifting block. I am the designer and Tony Andrews of Santa Cruz is the woodworker who executed it.

Larry Seeman – Carmel, CA

Where’s the Beef? It’s alive, well and living in Wadsworth, Ohio

Many of you no doubt remember the famous words “Where’s the Beef”?   Well in this instance, the beef refers to one of the most massive Roubo workbenches that I’ve seen in a very long time.  It also happens to be our March 2019 Workbench Idea submitted to us by Jerry (Chip) E. who lives in Wadsworth, Ohio.

Chip built one of the largest Roubo workbenches there is (a.k.a. “the beef”) and then fit it with a great leg vise powered by one of our premium wooden vise screw kits.  We know you’ll enjoy our latest customer provided Workbench Idea so here you go.

(Note: For those of you who may not be aware of our “Workbench Ideas” feature – previously known as “Workbench of the Month”, this feature is also alive, well and living on our Lake Erie Toolworks website under the “Workbench” main menu option.  We also have almost 90 workbenches for you to take a look out as well if you are looking for inspiration to craft your masterpiece.)

Lake Erie Toolworks, Roubo Workbench, Leg Vise, Wooden Vise, Vise, Vice

Lake Erie Toolworks, Roubo Workbench, Leg Vise, Wooden Vise, Vise, Vice

Lake Erie Toolworks, Roubo Workbench, Leg Vise, Wooden Vise, Vise, Vice

Lake Erie Toolworks, Roubo Workbench, Leg Vise, Wooden Vise, Vise, Vice

Lake Erie Toolworks, Roubo Workbench, Leg Vise, Wooden Vise, Vise, Vice

Lake Erie Toolworks, Roubo Workbench, Leg Vise, Wooden Vise, Vise, Vice

Lake Erie Toolworks, Roubo Workbench, Leg Vise, Wooden Vise, Vise, Vice

Lake Erie Toolworks, Roubo Workbench, Leg Vise, Wooden Vise, Vise, Vice

Lake Erie Toolworks, Roubo Workbench, Leg Vise, Wooden Vise, Vise, Vice

Lake Erie Toolworks, Roubo Workbench, Leg Vise, Wooden Vise, Vise, Vice

Lake Erie Toolworks, Roubo Workbench, Leg Vise, Wooden Vise, Vise, Vice

Lake Erie Toolworks, Roubo Workbench, Leg Vise, Wooden Vise, Vise, Vice

Lake Erie Toolworks, Roubo Workbench, Leg Vise, Wooden Vise, Vise, Vice

Lake Erie Toolworks, Roubo Workbench, Leg Vise, Wooden Vise, Vise, Vice

I built my Roubo using 8 ft long 6 X 6 timbers (untreated) for the top, and the legs, that I bought at Home Depot. The bench is 8 ft long, 27 1/2 inches wide, and 34 1/2 inches tall.

I glued the timbers together using wood glue and 1/2-inch dowel rods. I used a router sled to level out the top. The timbers were fairly straight, so at most I removed 1/8th of an inch-high spot.

I cut the large dovetails mostly by hand, using Japanese pull saws, finishing them off with power tools.  They came out pretty good, however I did have to use some wedges to tighten everything up. As I said, the timbers were pretty straight, however the ends were rough.

On the left side of the bench, I removed 3/4 of an inch from the top, about 6 inches in and added a piece of Padauk. I also added a piece of 3/4 inch plywood on the end, under the Padauk, to cover up the roughness.

Similarly, on the right side, I removed 3/4 inch from the top, and also added 3/4 plywood on the top and a piece of 1 X 6 pine on the outside. this side is where I added the first vise. The first vise is an Eclipse 10 1/2-inch woodworkers’ vise.  I mortised under the bench about 1 1/4 inch deep. I wanted the top of the vise closer to the top of the workbench.  This vise is about 1/4 of an inch from the top of the bench. I used 3/4-inch plywood for the cheeks.  I also used thru bolts and nuts. It is rock solid.

The second vise is a Leg Vise. This vise is made from a 1-inch piece of curly maple, glued to a 2 X 10.  It is 8 inches across, 32 1/2 inches tall, and 2 3/8 inches thick.  I used the Premium Wood Screw kit from Lake Erie Toolworks, in conjunction with a Benchcrafted criss-cross.

The wood nut, was mortised about an inch into the back of the leg. I added leather to the insides to protect the work pieces.  The sliding deadman is made the same way, 1-inch curly maple, glued to a 2 x 10. It is 7 1/2 inches wide, 17 1/2 inches tall, and 2 3/8 inches thick.  The stringers are 2 X 6s, I mortised 3/4 of an inch in the bench leg, and in the stringer, used wood glue and 2 3/4 wood screws to attach them.  I then added 2 X 2s on the inside of the stringers, and added tongue and groove as the bottom platform.  I used a router to cut a 3/4 wide by 3/8 deep channel for T-Track. I went all the way across the top in both directions. I’m using Rockler T-track, and accessories. I also added a self-sticking tape measure across the front left of the bench.

As for the finish, the Leg Vise, Sliding Deadman, and top of the Bench, I used 3 coats of Amber Shellac, one coat of Danish oil, and the 3 coats of lacquer.  I wanted a hard surface for the top of my workbench.  The rest of the bench has one coat of pre-stain conditioner, one coat of Golden Oak stain, and 3 coats of lacquer.

Jerry (Chip) L. E. – Wadsworth, Ohio – USA